Sew a Felt Christmas Mouse
In the big hot land Down Under, we don’t get to really enjoy the beauty of a white Christmas (or even a green Christmas come to think of it!). It’s hot, and dry, and characterised by seafood, salads, swimming and sun! But that doesn’t mean we don’t often dream of a snowy Christmas, snuggled up by the fire with a hot chocolate, staring contentedly at our fresh evergreen Christmas tree laden with cookie decorations and popcorn garlands. I’m painting a pretty picture here, right?
One way to bring a traditional Christmas to Australia is with decorations! And if you know me, you know that there’s nothing I like more than hand-stitching some gorgeous little creations in felt. In fact, I love 100% wool felt so much, I’ve written some tips and tricks for working with it HERE. It’s just so versatile! And forgiving!
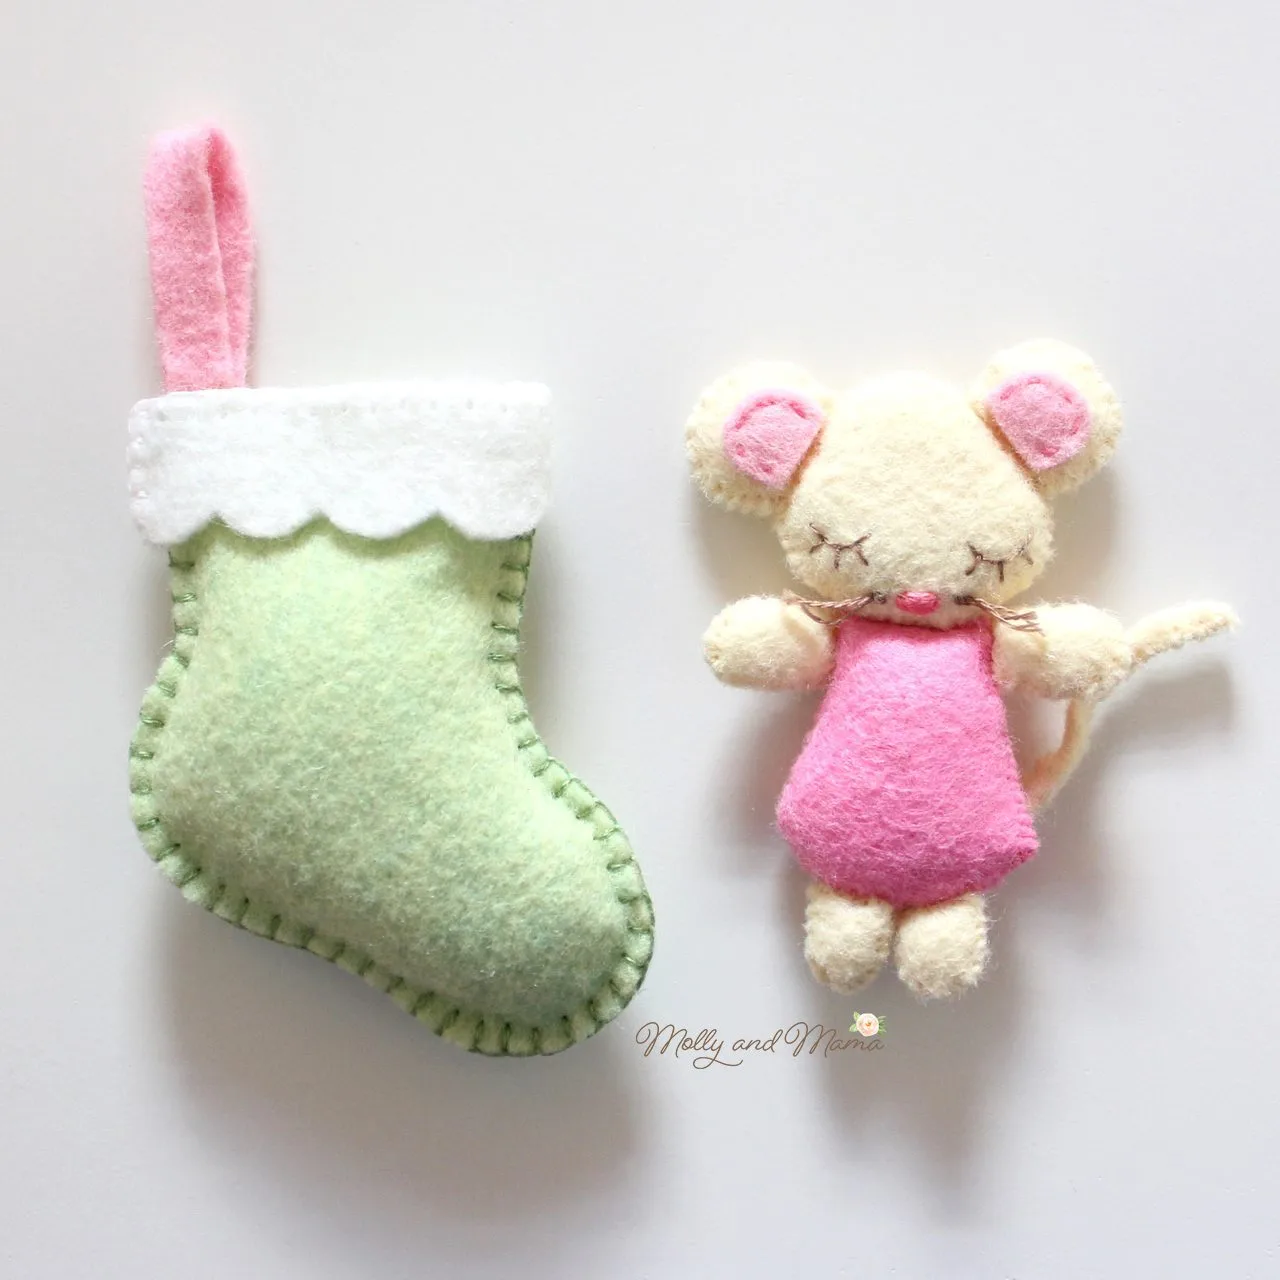
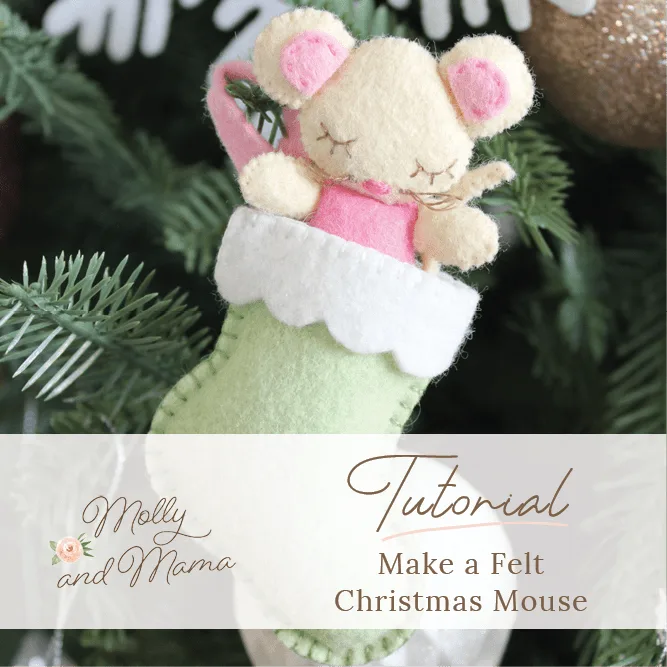
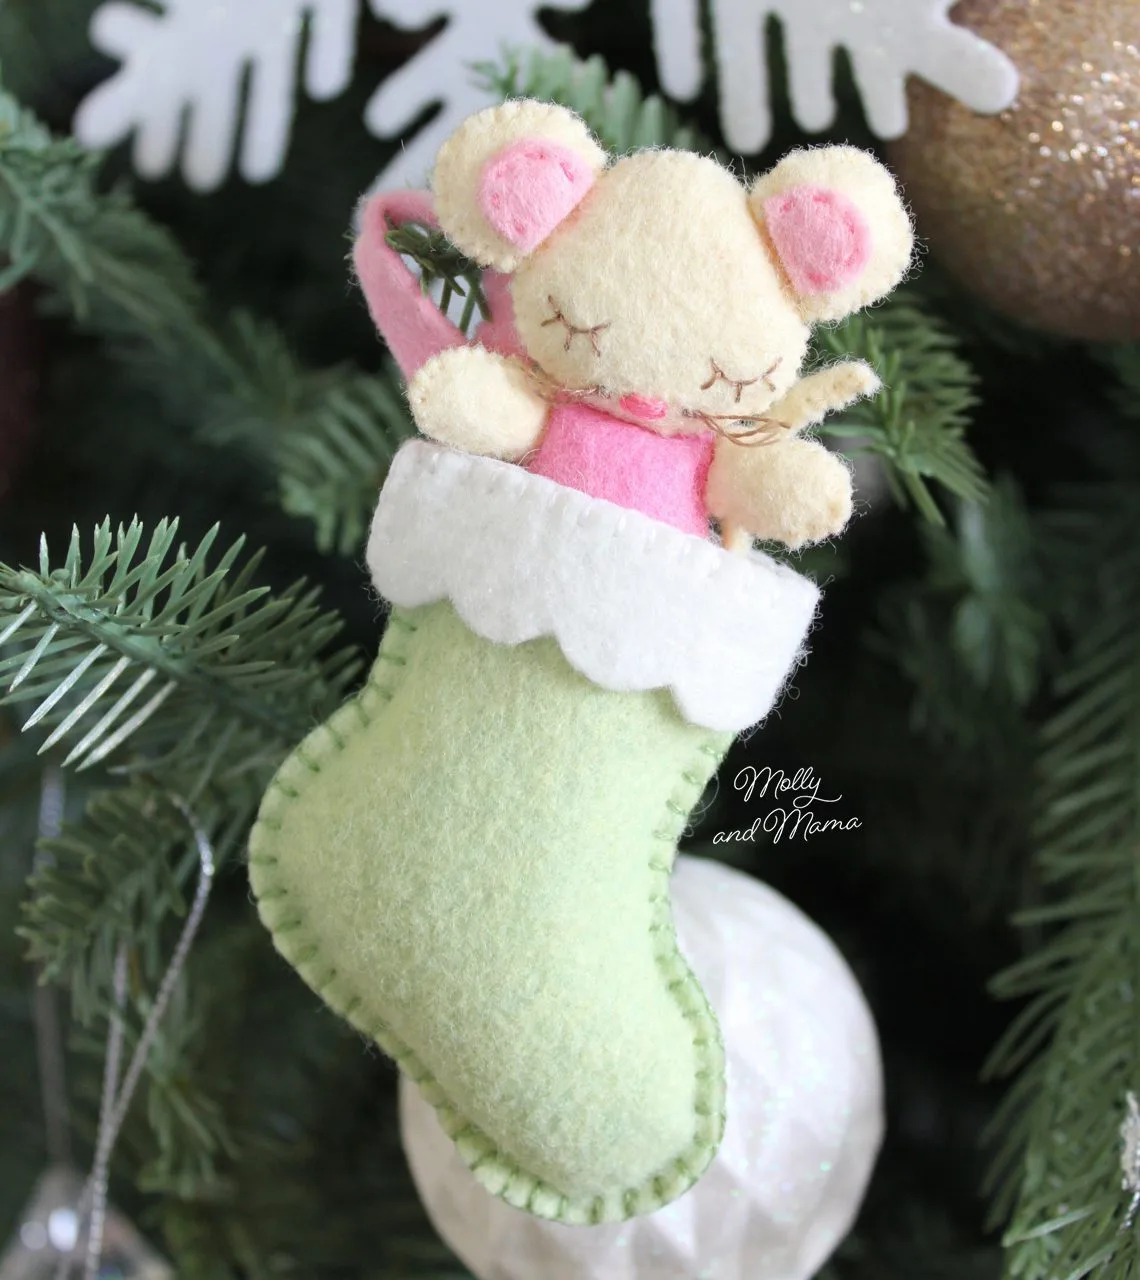
With some scraps of wool felt, a needle and embroidery floss, you can create this adorable little mouse and also stitch her sweet little stocking. She’s only small (3 inches tall and 2 inches wide), so she’s a bit fiddly to make. But she’s easy to sew. And so is her stocking. It’s only 3 inches tall (not including the hanging loop).
Why stop at one felt Christmas Mouse? You could make a whole bunch of cute mice in stockings to cover your tree. Now wouldn’t that be a sight? They’d make adorable gifts too!
*This post includes Affiliate or Ad Links. If you make a purchase using an affiliate link, I will earn a small commission that doesn’t change your purchase price, but helps me to continue to bring you this content. Thanks for your support!
Before you get started, make sure you print out the template provided HERE. This pattern (the template and instructions) is for personal use only.
YOU WILL NEED
- scraps of 100% wool felt. I used a cream colour for the body, pale pink for the inner ears and stocking hanger, candy pink for the mouse’s dress, white for the stocking cuff and pale green for the stocking body.
- embroidery floss in shades that coordinate with your felt, and also a light brown.
- freezer paper
- cotton thread in shades to match the mouse.
- embroidery needle.
- small sharp scissors for felt cutting.
- paper scissors.
- small amount of polyester stuffing.
- a small tool to manoeuvre stuffing (like a chop stick or crochet hook).
- a print out of the template. You can download it HERE.
WHICH STITCH?
This pattern uses running stitch, back stitch, blanket stitch and whip stitch. Here’s a handy image to remind you how the different stitches look. You can also visit my Molly and Mama Embroidery Stitch Basics post for a refresher on the different stitch types.
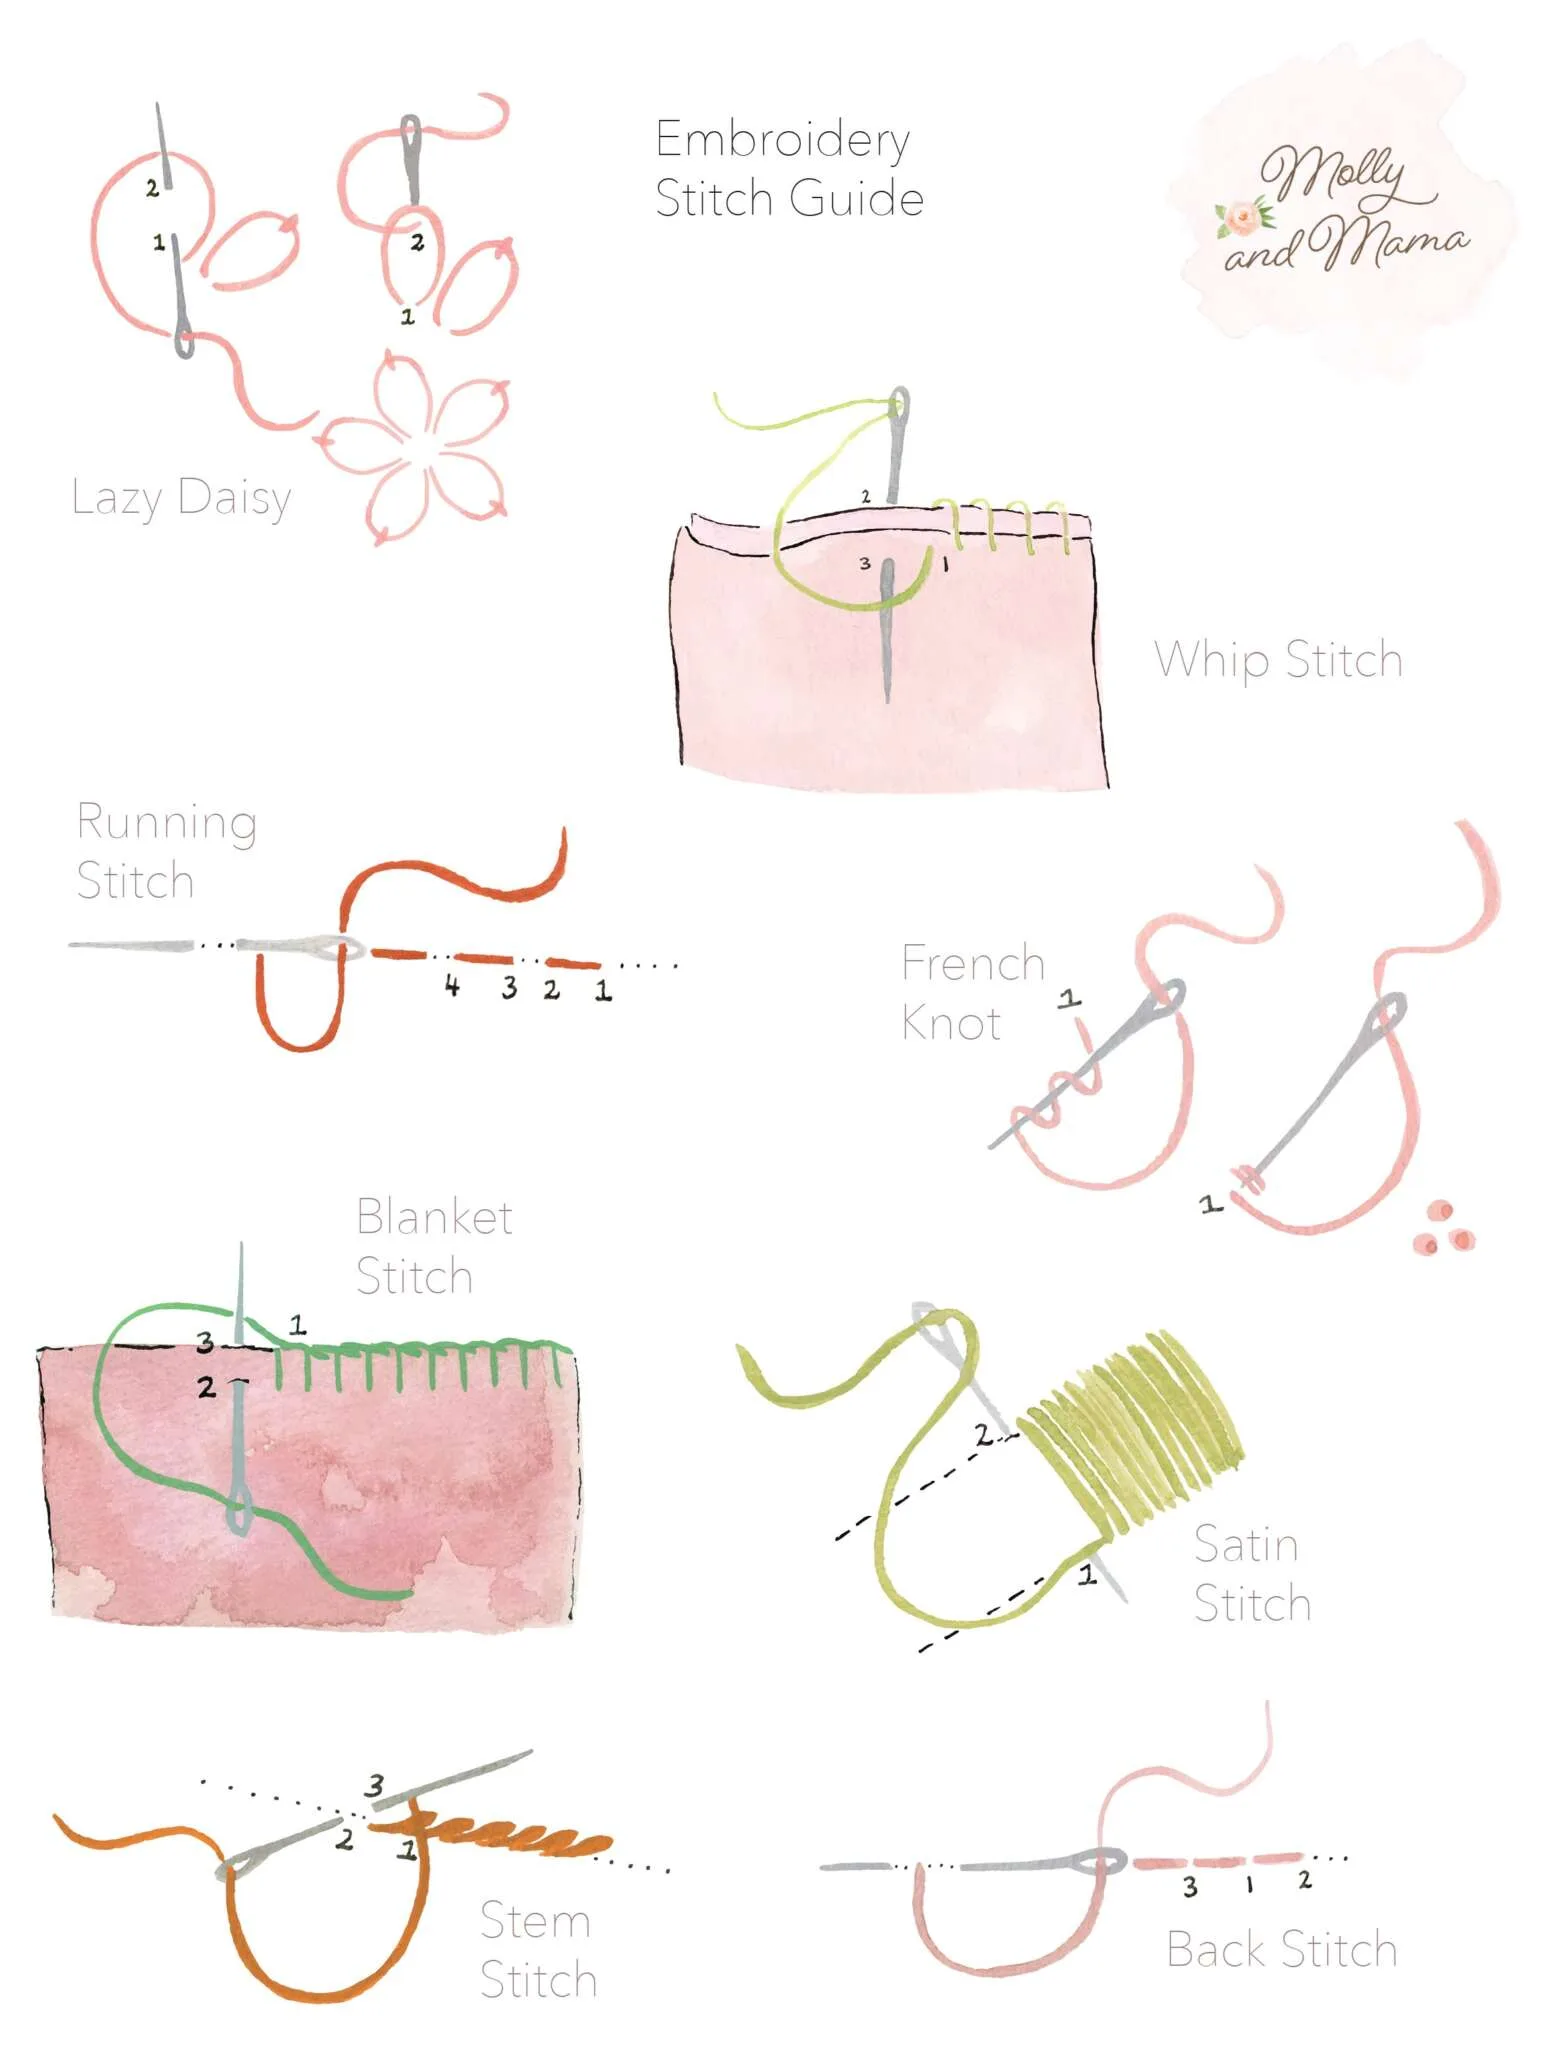
WHICH THREAD?
I used six stranded embroidery floss for the pink inner ears, and the facial features of the mouse. I also used it to blanket stitch all the stocking. I used normal sewing thread to whip stitch the mouse together, including all the body pieces and the pink dress.
LET’S GET STARTED!
It’s a good idea to read the tutorial through once before you begin, just to get a feel for what the project is asking of you. Got a question? I’d love to help. Leave a comment or shoot me a message via the contacts tab.
CUT OUT THE FELT PIECES
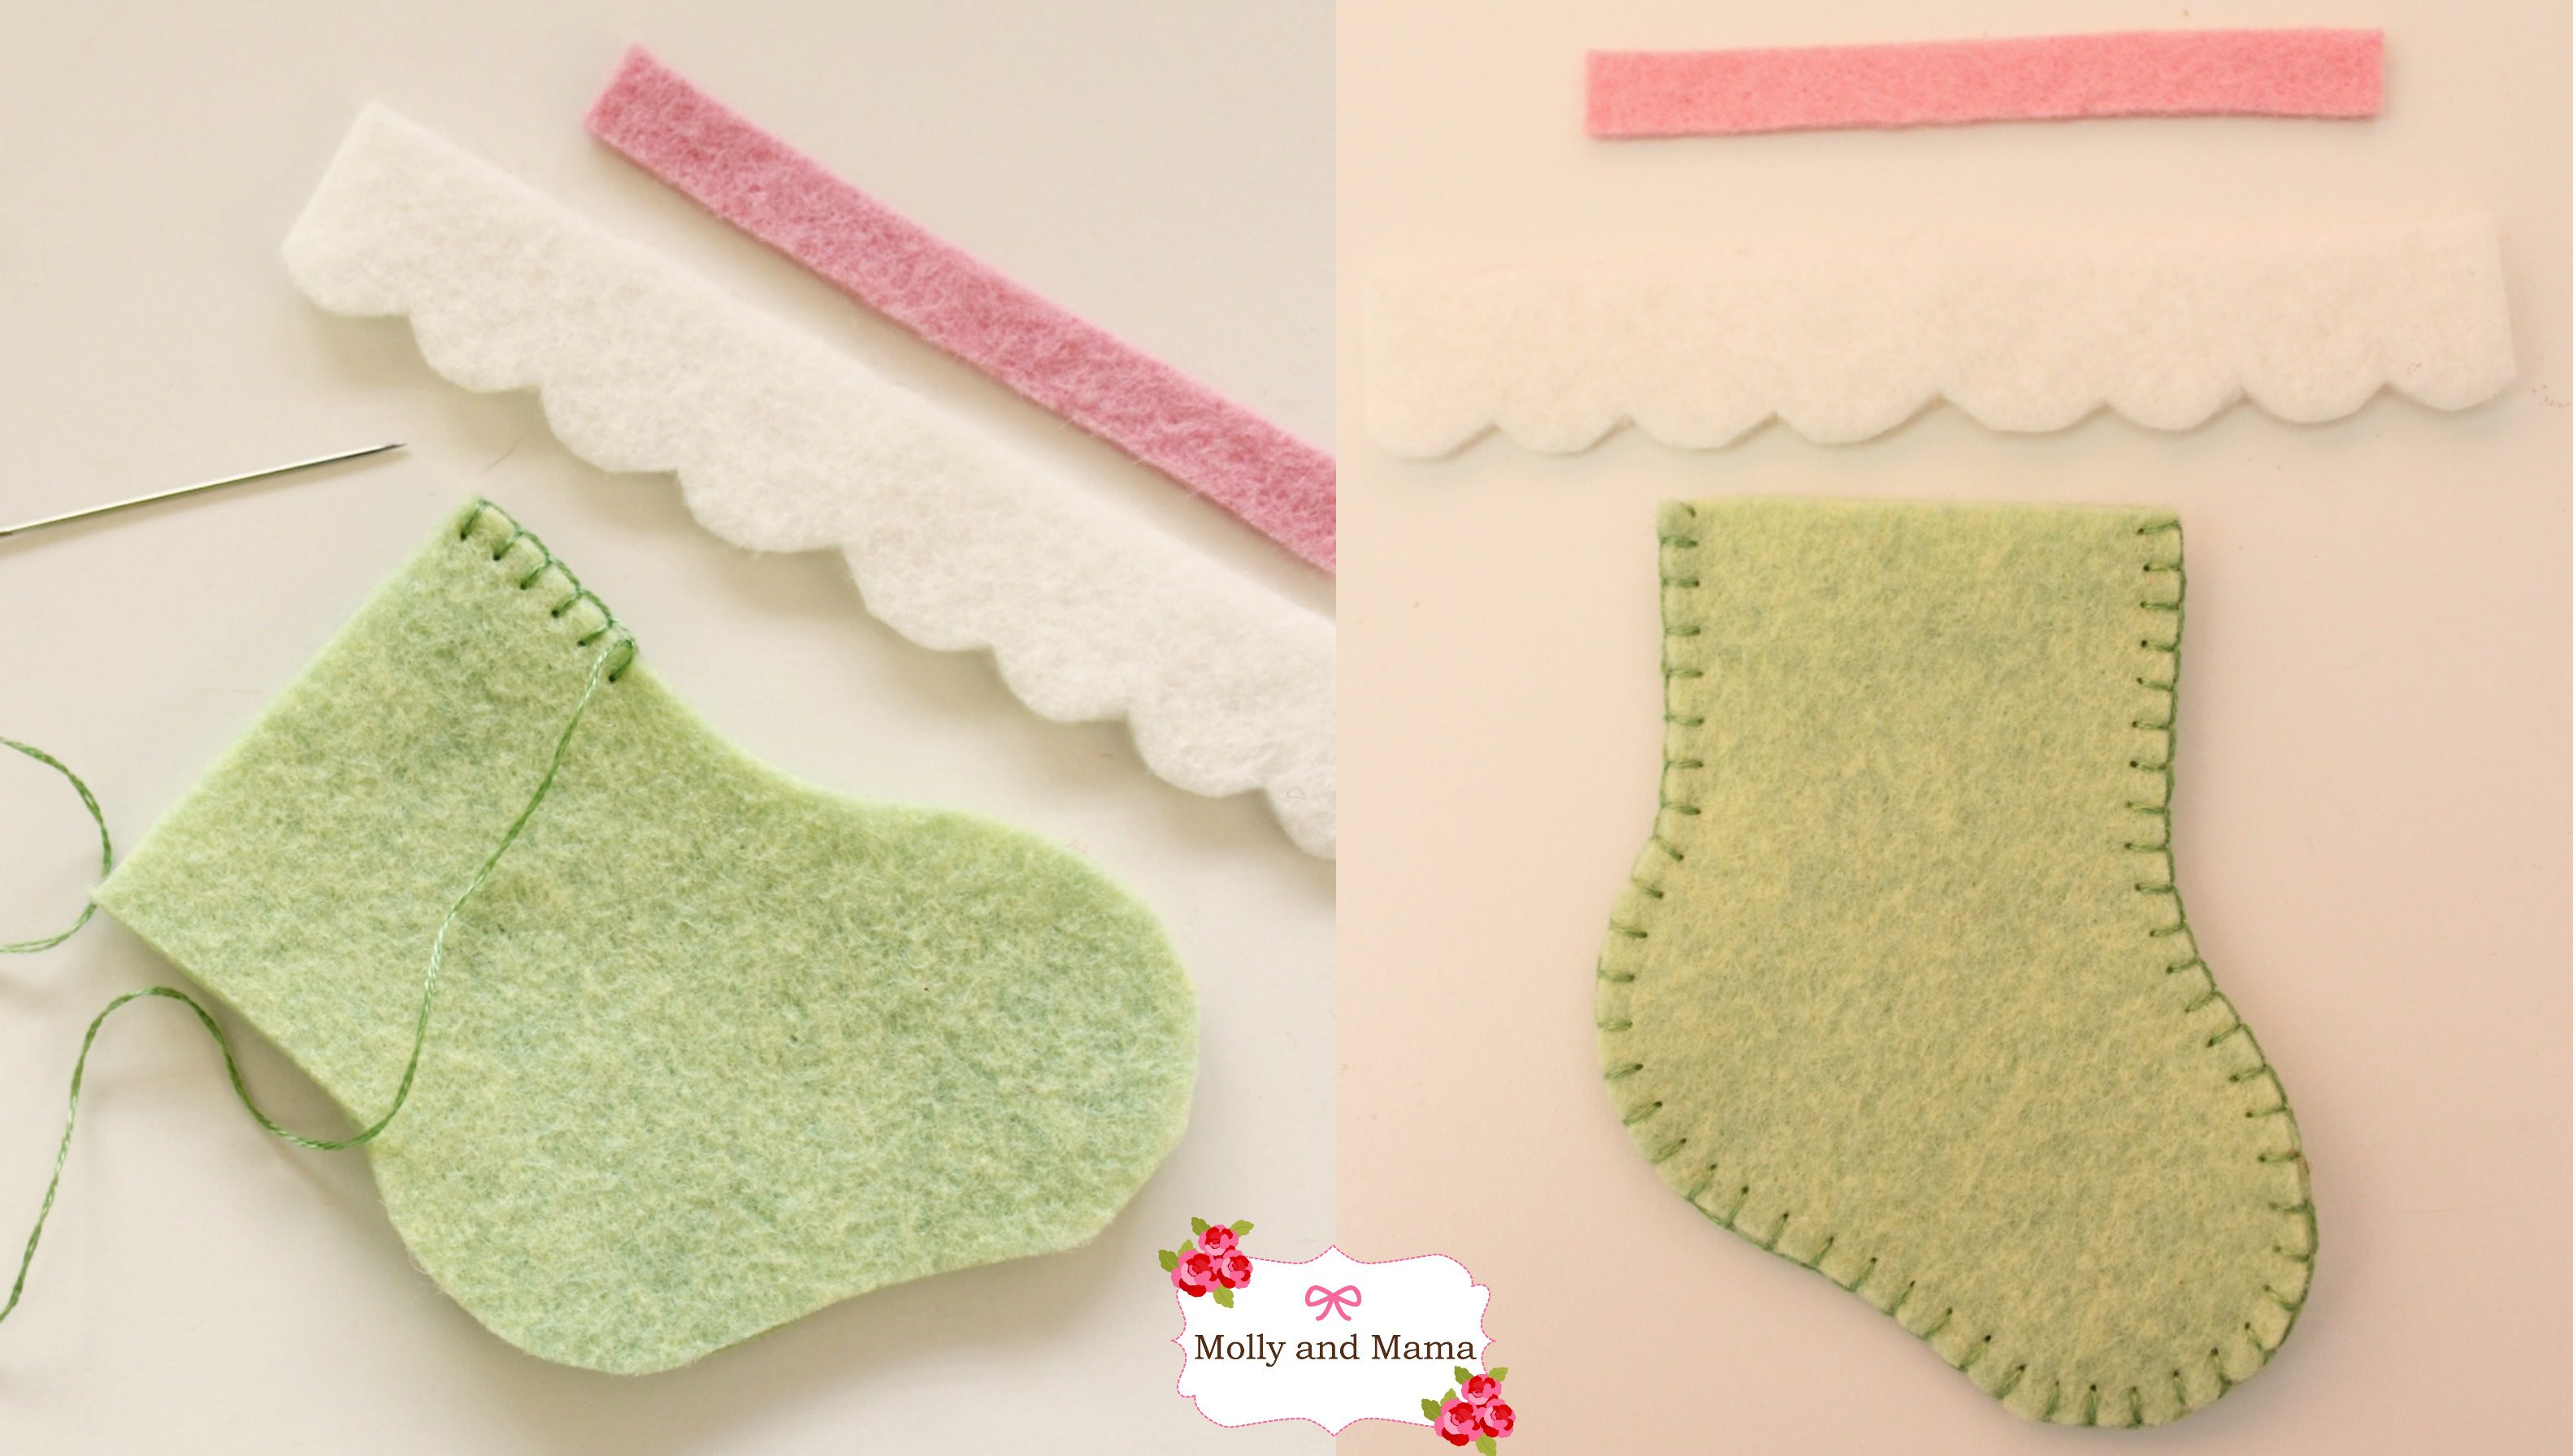
Use the template and freezer paper to cut out all the shapes as listed. You’ll need two of everything for the mouse (except one tail piece). You’ll need two stocking pieces, one stocking cuff and one hanging loop. For tips and tricks for accurately cutting felt shapes and using freezer paper, see this tutorial for Transferring Templates to Felt.
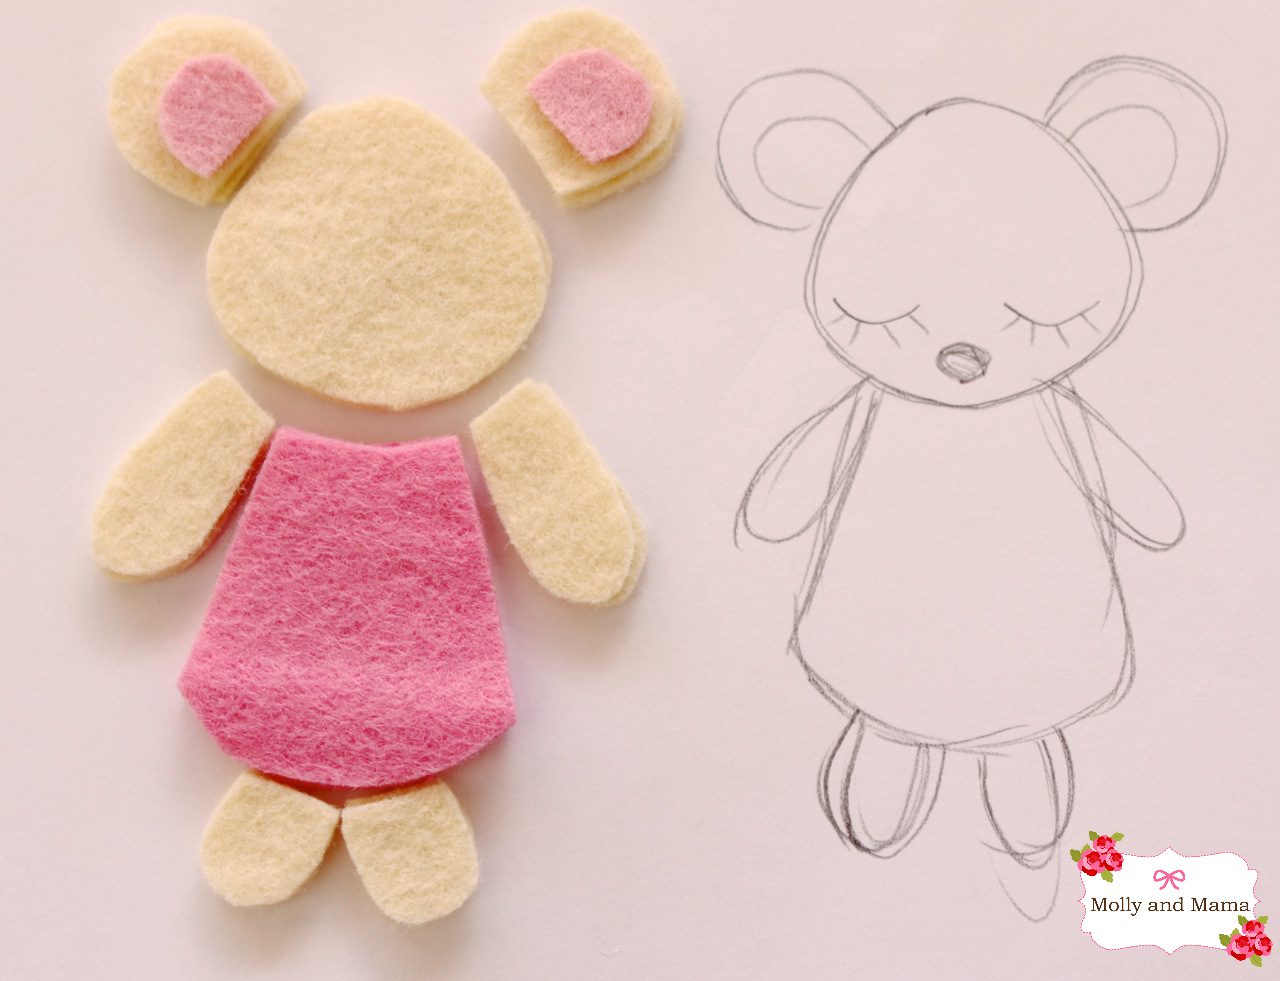
Once you have all your pieces cut out, start by assembling the mouse. You’ll need to individually stitch the ears, head, body, arms, legs and tail. Then piece them altogether.
SEW THE MOUSE
All body parts are stitched with a single strand of sewing thread. Small tight whip stitches are used.
EARS To make the ears, use a fine running stitch to attach the pink inner ears onto the front piece of ear felt, using one strand of pink embroidery floss. Make sure you have a left ear and a right ear! Change your thread to normal sewing cotton that matches the colour of the mouse felt. Starting at the base of the ear and continuing around the top, whip stitch the ear front and back together. Stop stitching when you get to the straight base of the ear. But keep your needle threaded and your cotton intact.
Roll a tiny amount of polyester fill or stuffing into a ball and gently insert it into the space inside the ear. A chopstick, crochet hook, or even closed scissor blades are a good tool to help manoeuvre the stuffing in. Once gently stuffed, continue whip stitching the ear closed. Be sure to secure your thread well and hide the thread tail inside the ear. Follow the same method to complete the second ear.
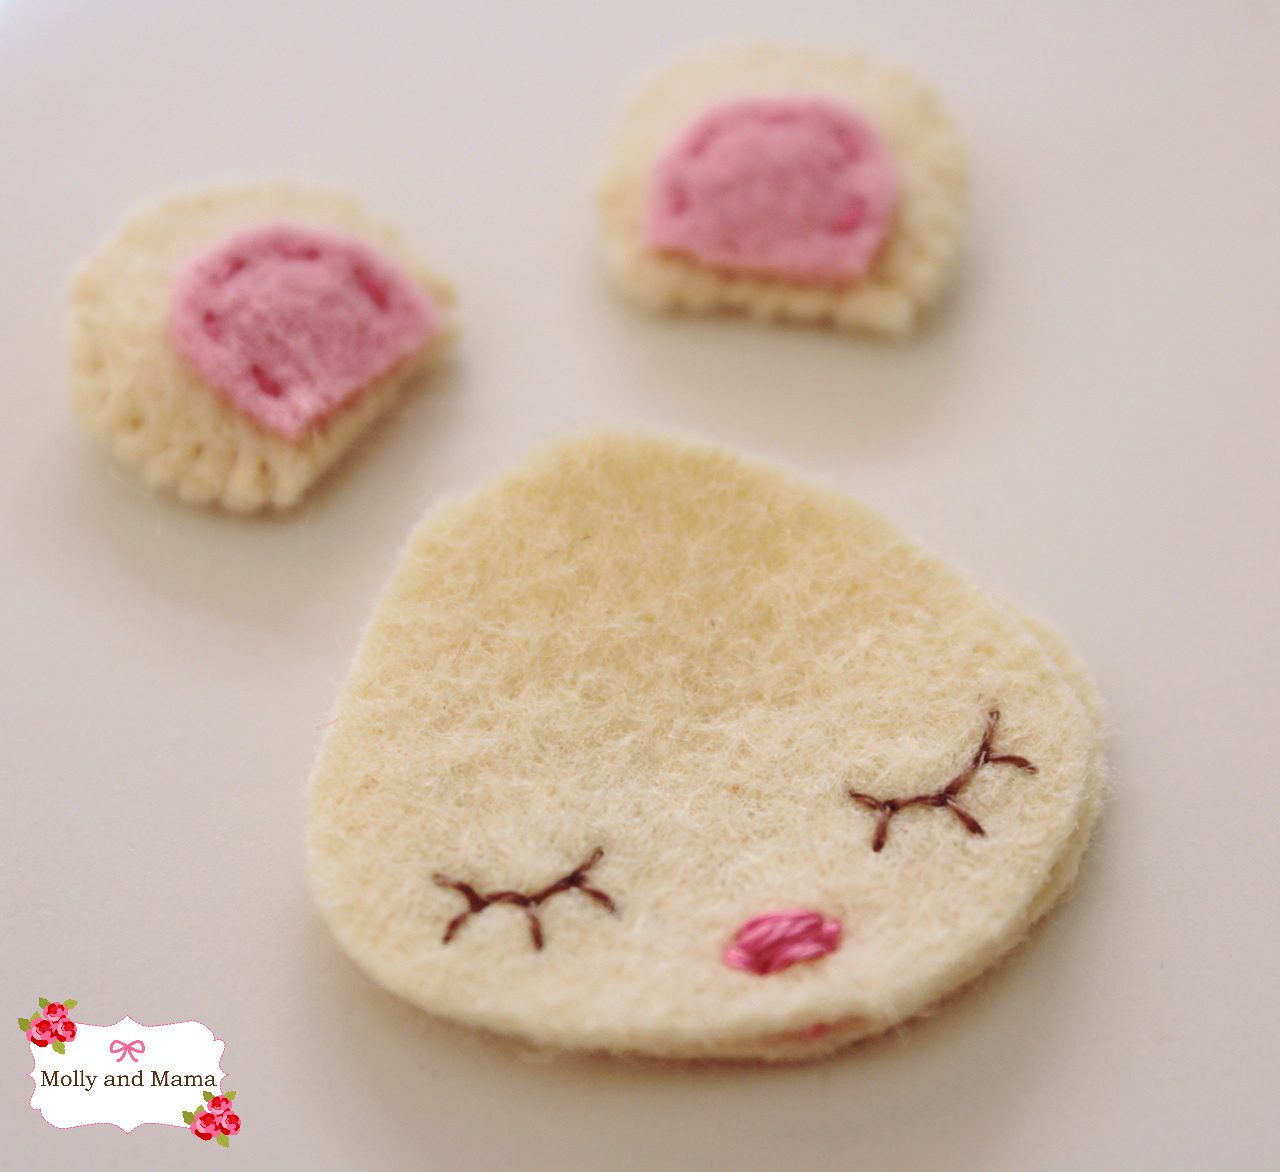
HEAD With a single strand of light brown embroidery floss, embroider the mouse’s eyes on. Use the template as a guide or follow this simple tutorial for adding embroidered details using tracing paper. Secure your stitching well on the back.
Change your needle to two strands of pink embroidery floss and sew a few horizontal straight stitches to make the nose. We’ll do the whiskers after we’ve stuffed the head.
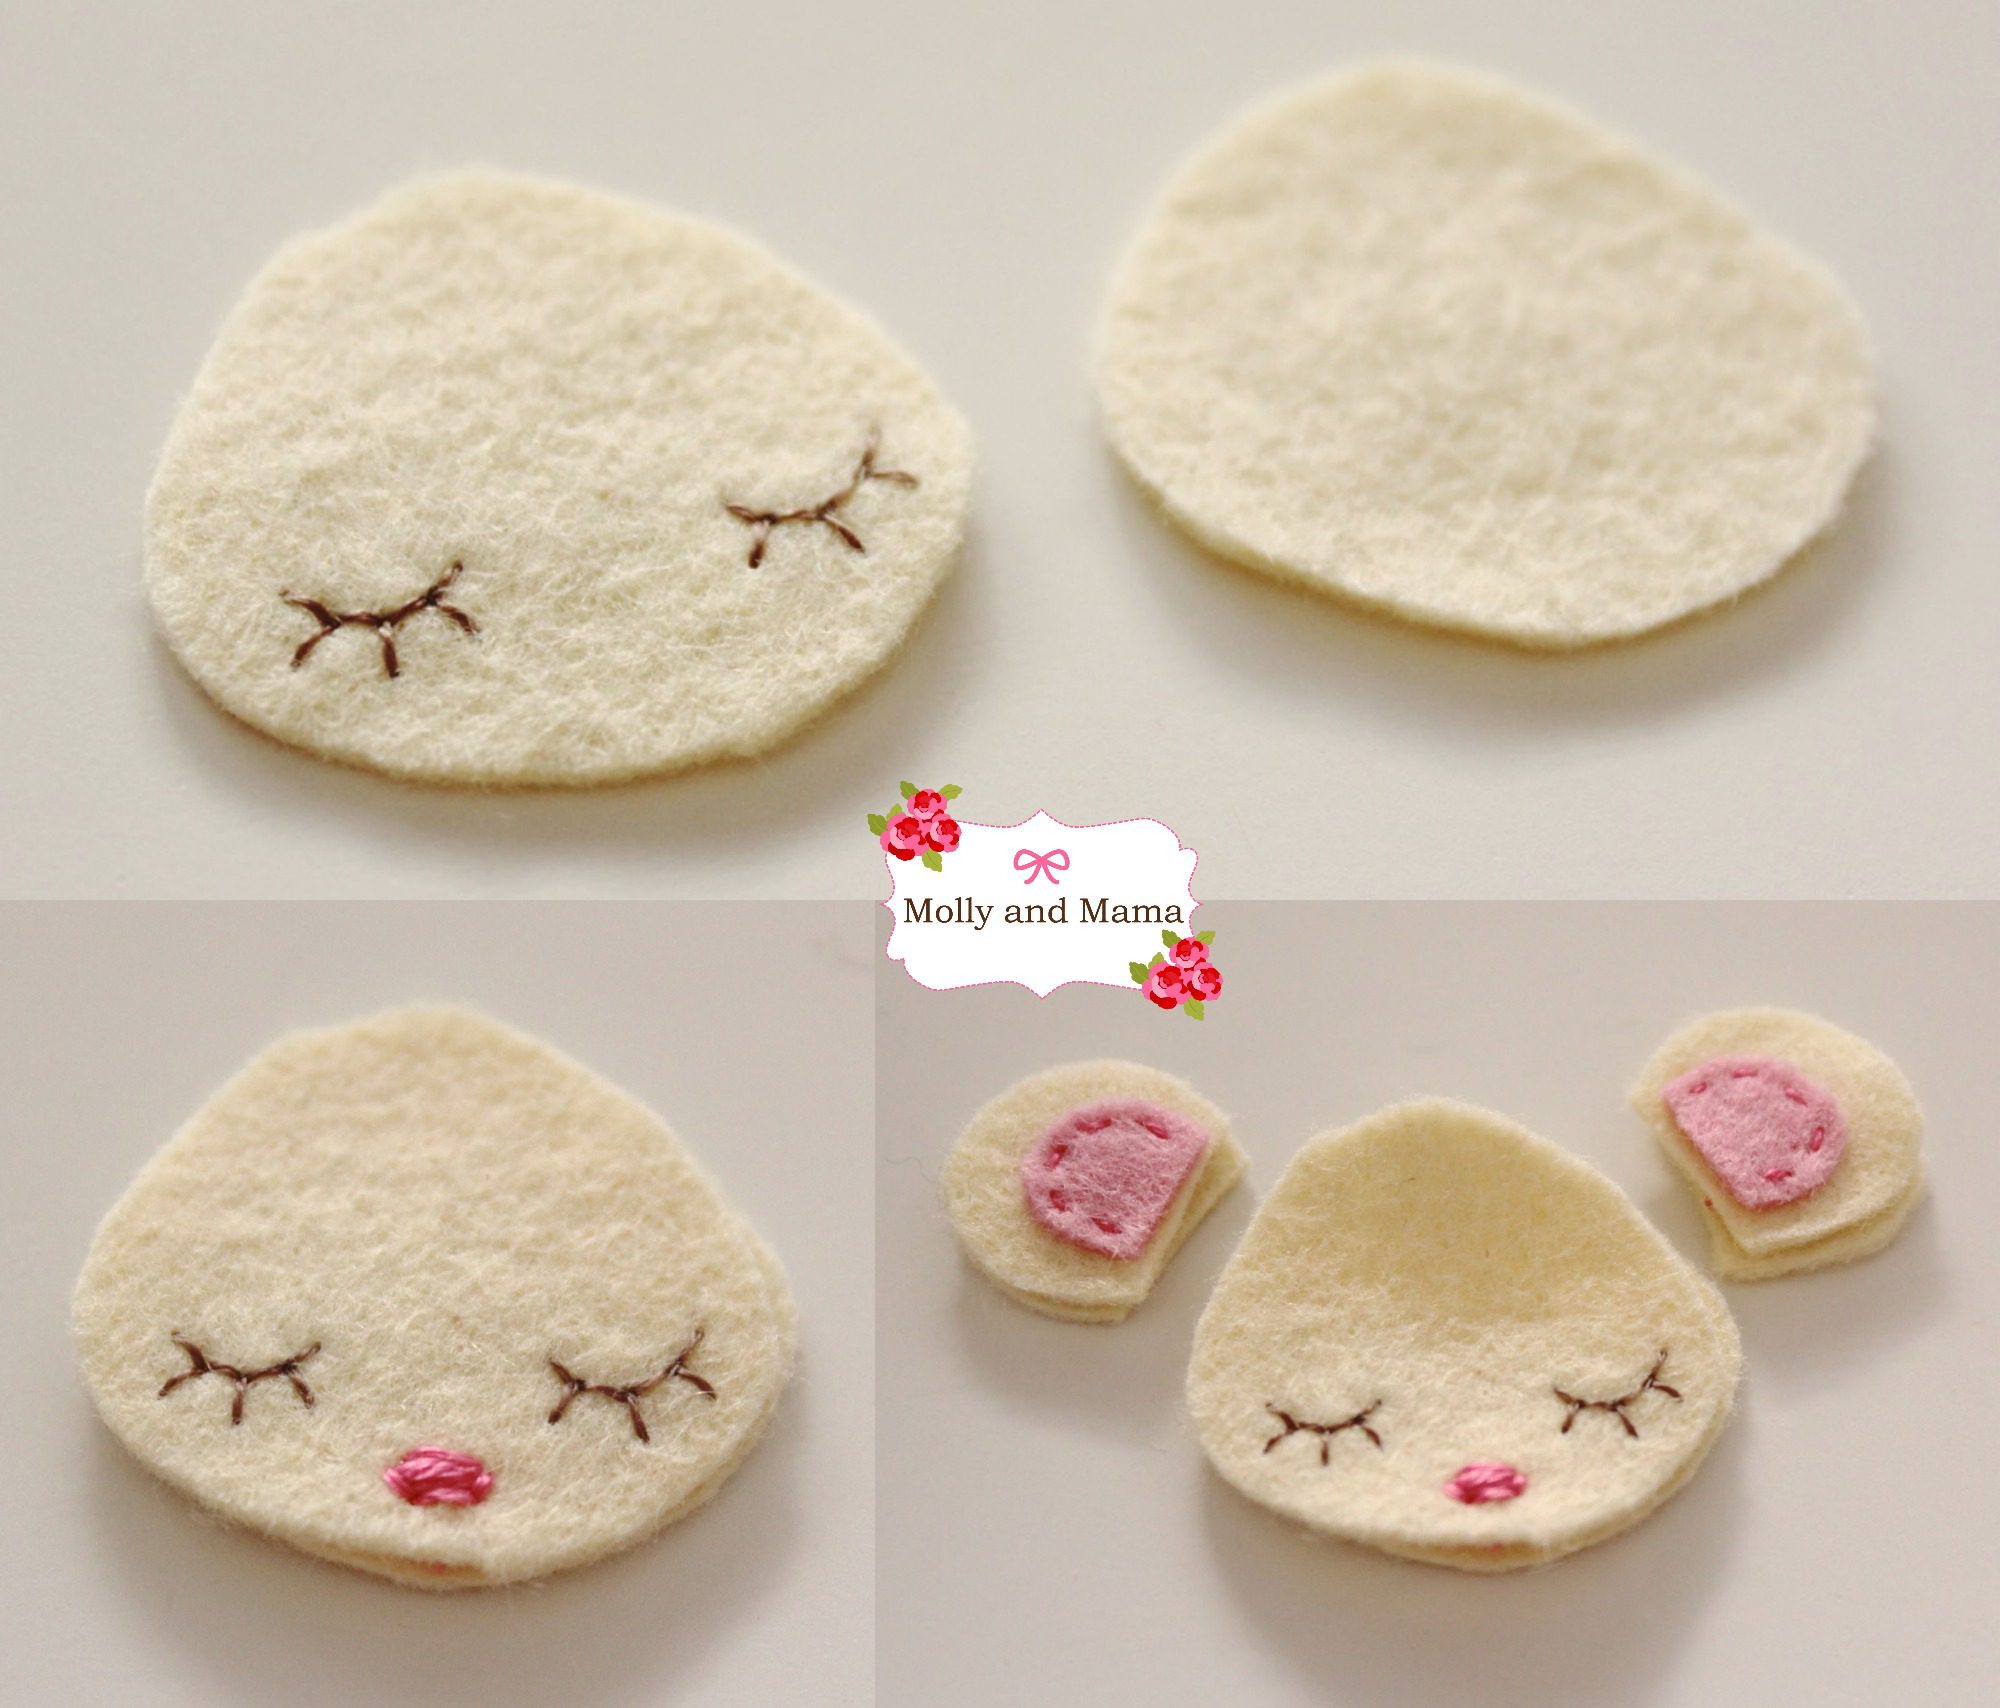
With a single strand of sewing cotton (to match your mouse colour), whip stitch the head front and back together. Start at the base of the head and continue your stitching around leaving a small 1/2 inch gap. Use the gap to softly and gently stuff the head with polyester fill. Once stuffed, continue to whip stitch the head closed. Secure your stitching well.
Now for the whiskers. Use three strands of embroidery floss on your needle but do not tie a knot in the end. Insert the needle near the mouse nose and then bring the needle back out just beside it. Pull your thread through but leave an inch of thread at the end. You’ll trim this part to make the whiskers. Take your needle back through the first hole to make a tiny stitch, and guide the needle through the inside of the head, over to the other side of the nose. Bring it out just beside the nose (so that the exit point lines up with the same one you stitched first). Make a small back stitch over the exit point and then draw the needle and thread tight. Trim the ends on each whisker to about 1/2 inch long.
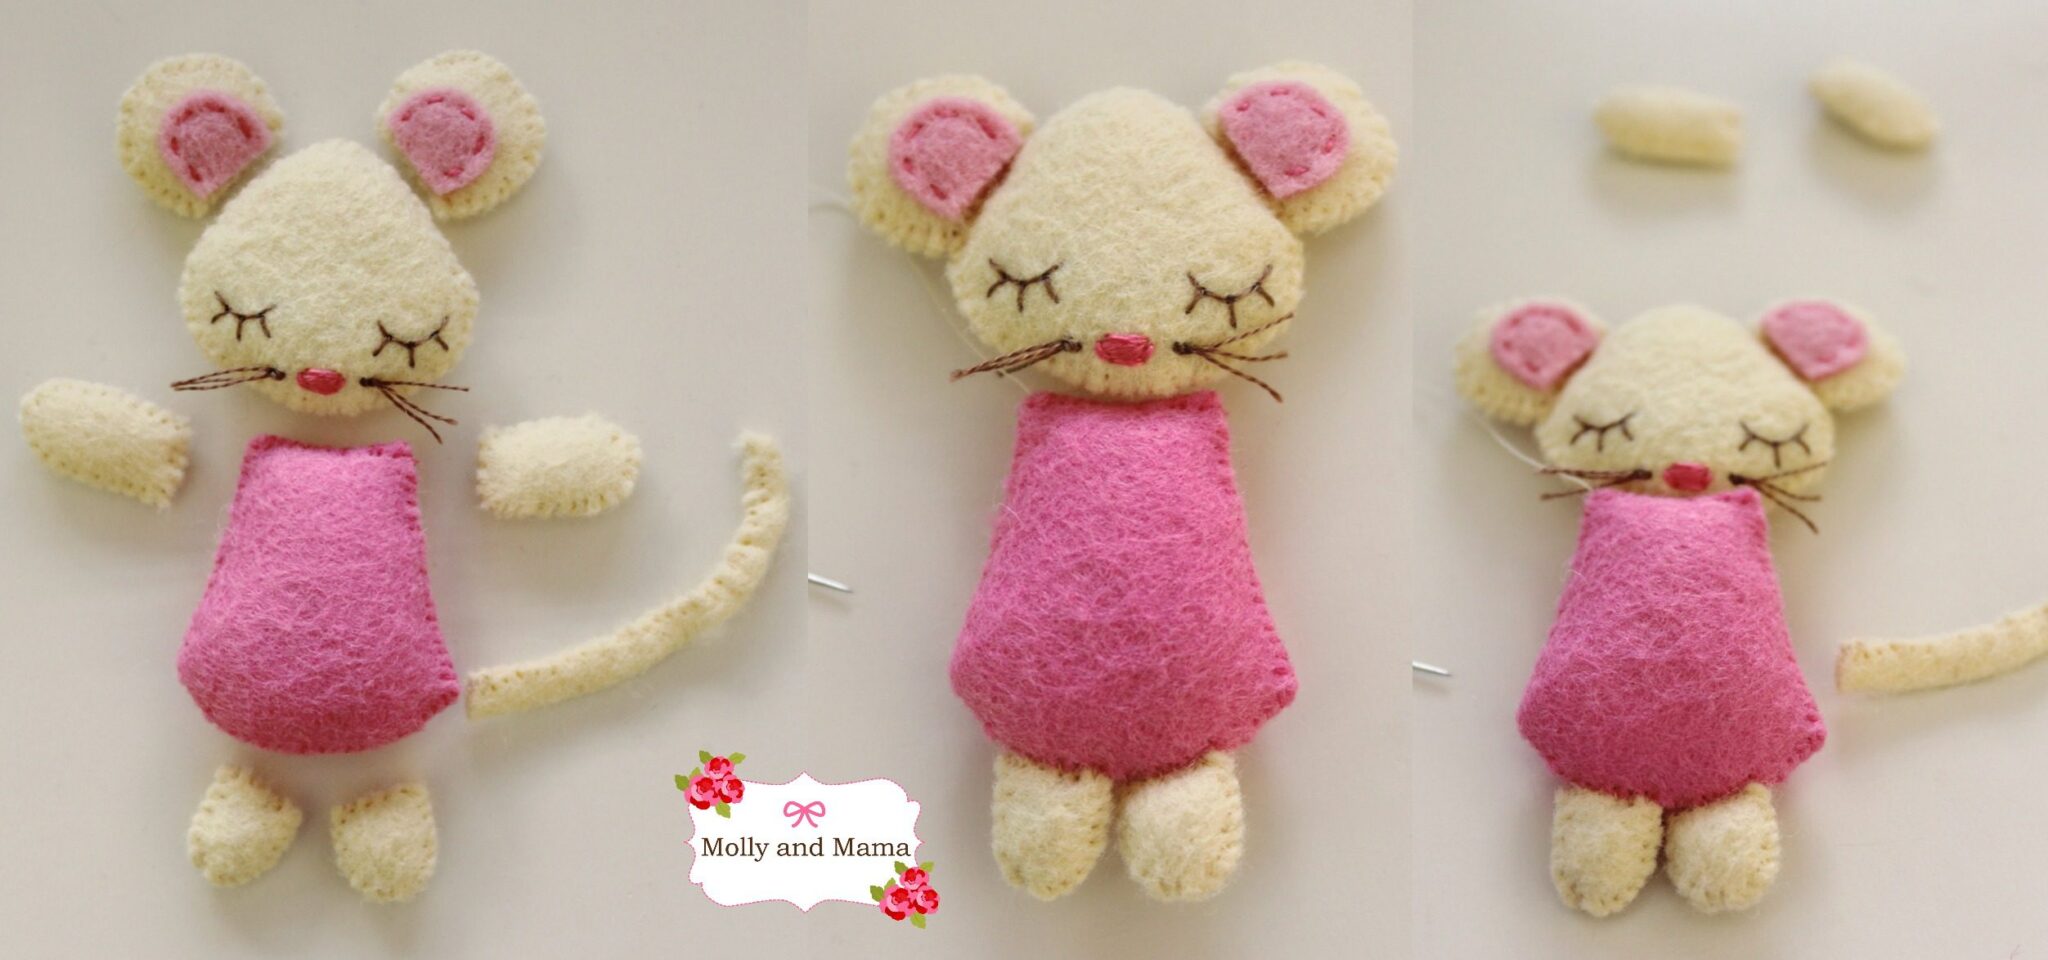
BODY ARMS and LEGS Use the same method to stitch the body, arms and legs. Use a single strand of sewing cotton for all parts. Whip stitch each body part (front and back), being sure to leave a space at the base of each shape to enable you to add polyester fill, before stitching the space closed.
TAIL Fold the tail piece in half lengthways. Start whip stitching the tail from the wider part at the base to the narrower tip. Once you reach the tip of the tail, thread your needle back though the length of the felt tail so it comes out the base. Give the thread a gentle pull so that it gathers up the tail. Add a couple of stitches to close the base of the tail and to secure the gather.
ASSEMBLE THE MOUSE
Thread your needle with a single strand of sewing cotton in the same colour as your mouse body. With small, tight whip stitches, attach the ears to the head first. Next stitch the legs on place. Attach the head and the arms after that.
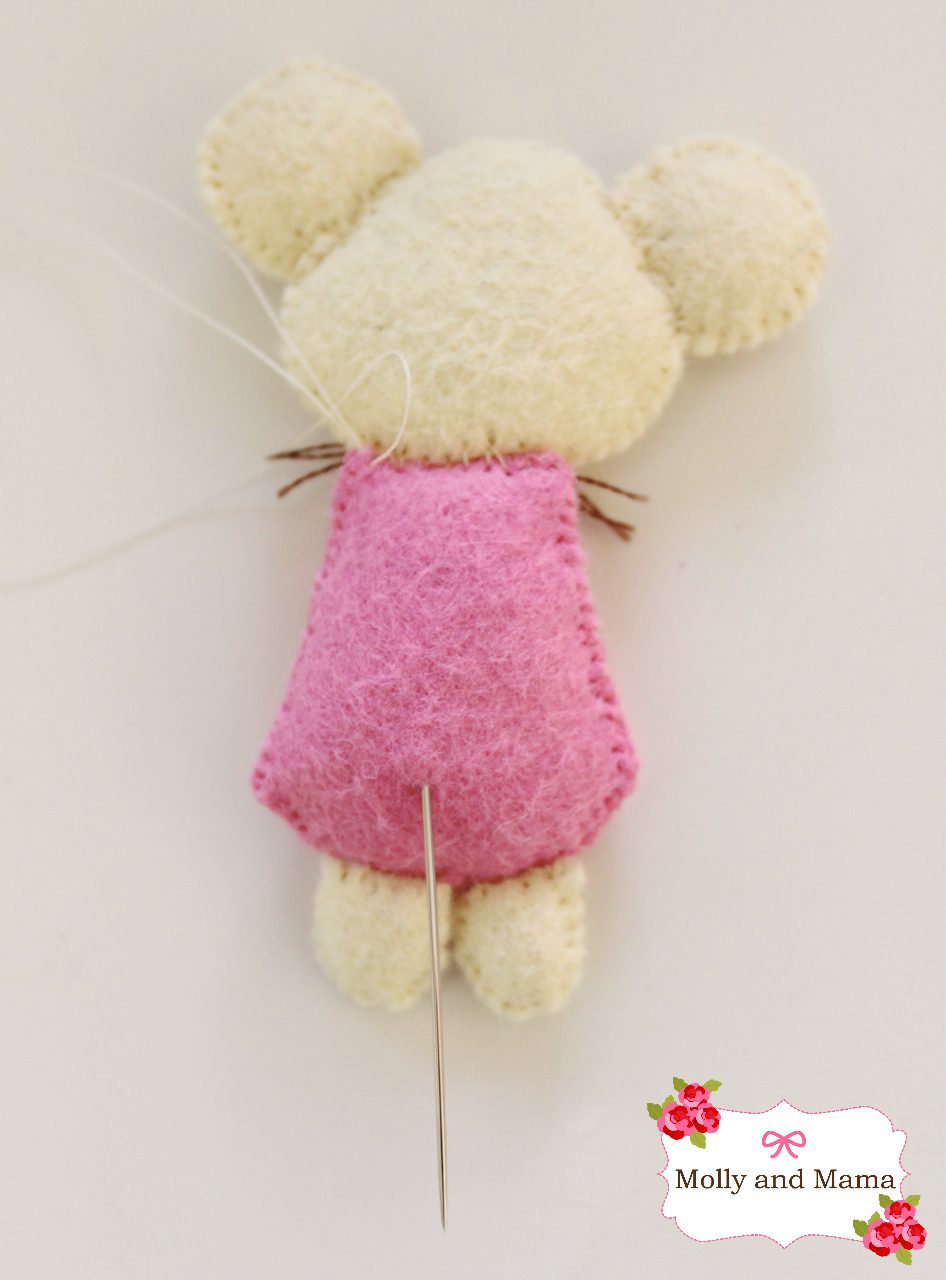
Sew on the tail last. To do this, guide your needle through a side seam so that it pops out at the back of the mouse’s body (as seen below). Make small whip stitches to attach the base of the tail to the mouse’s back.
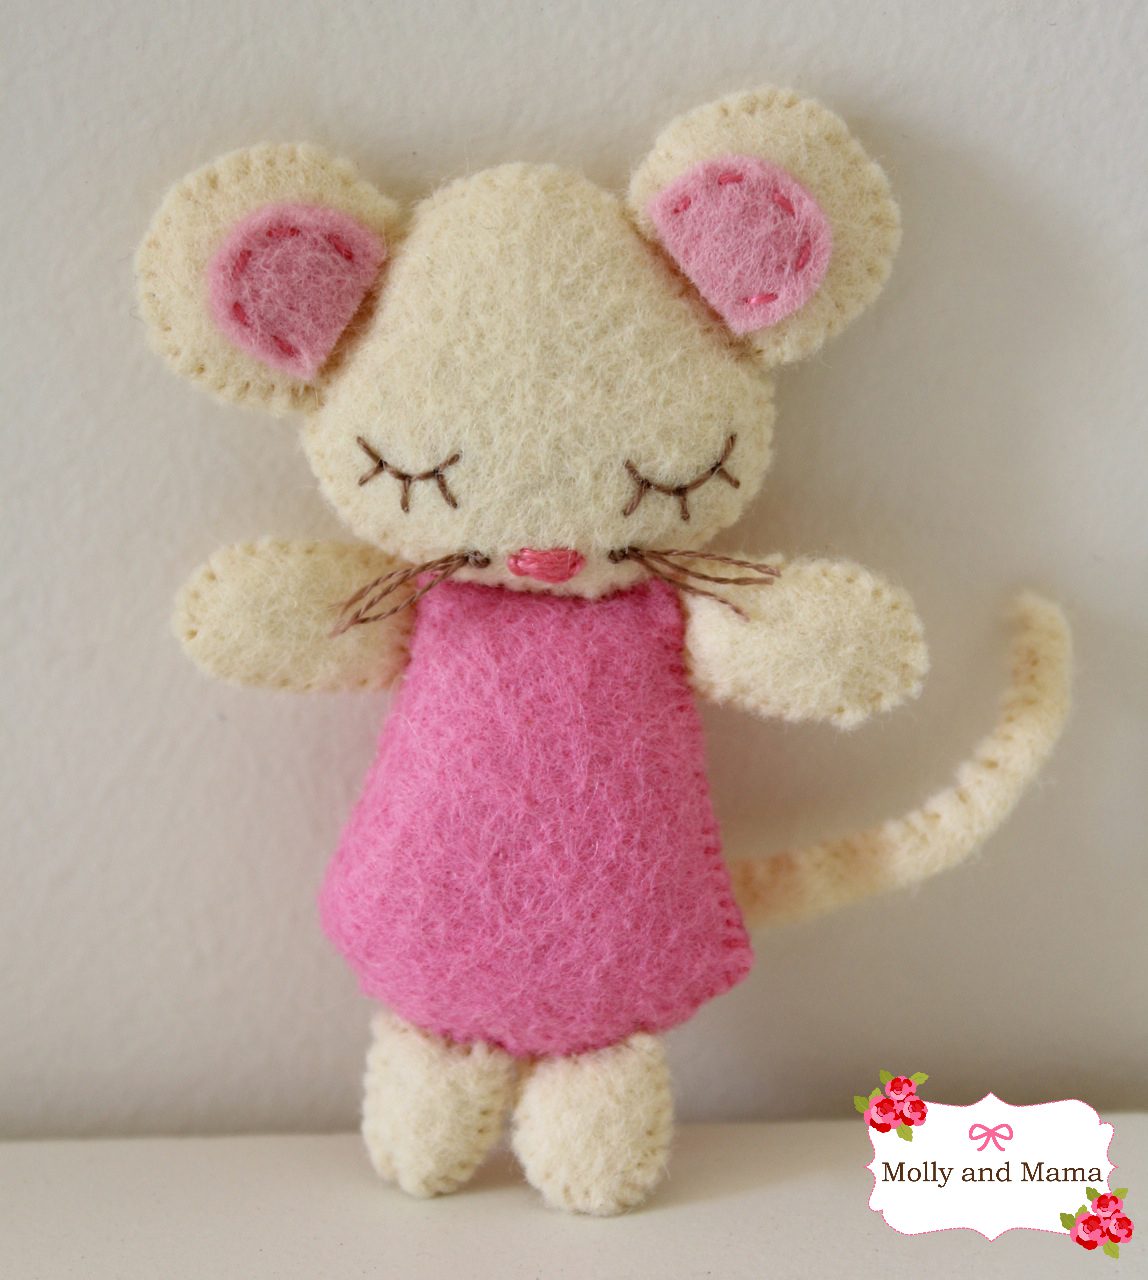
Your finished mouse will look something like this;
SEW THE STOCKING
Using two strands of embroidery floss, blanket stitch the sides of the stocking front and back together. I used green floss to complement my green stocking felt. Be sure to secure your stitches well at the beginning and the end.
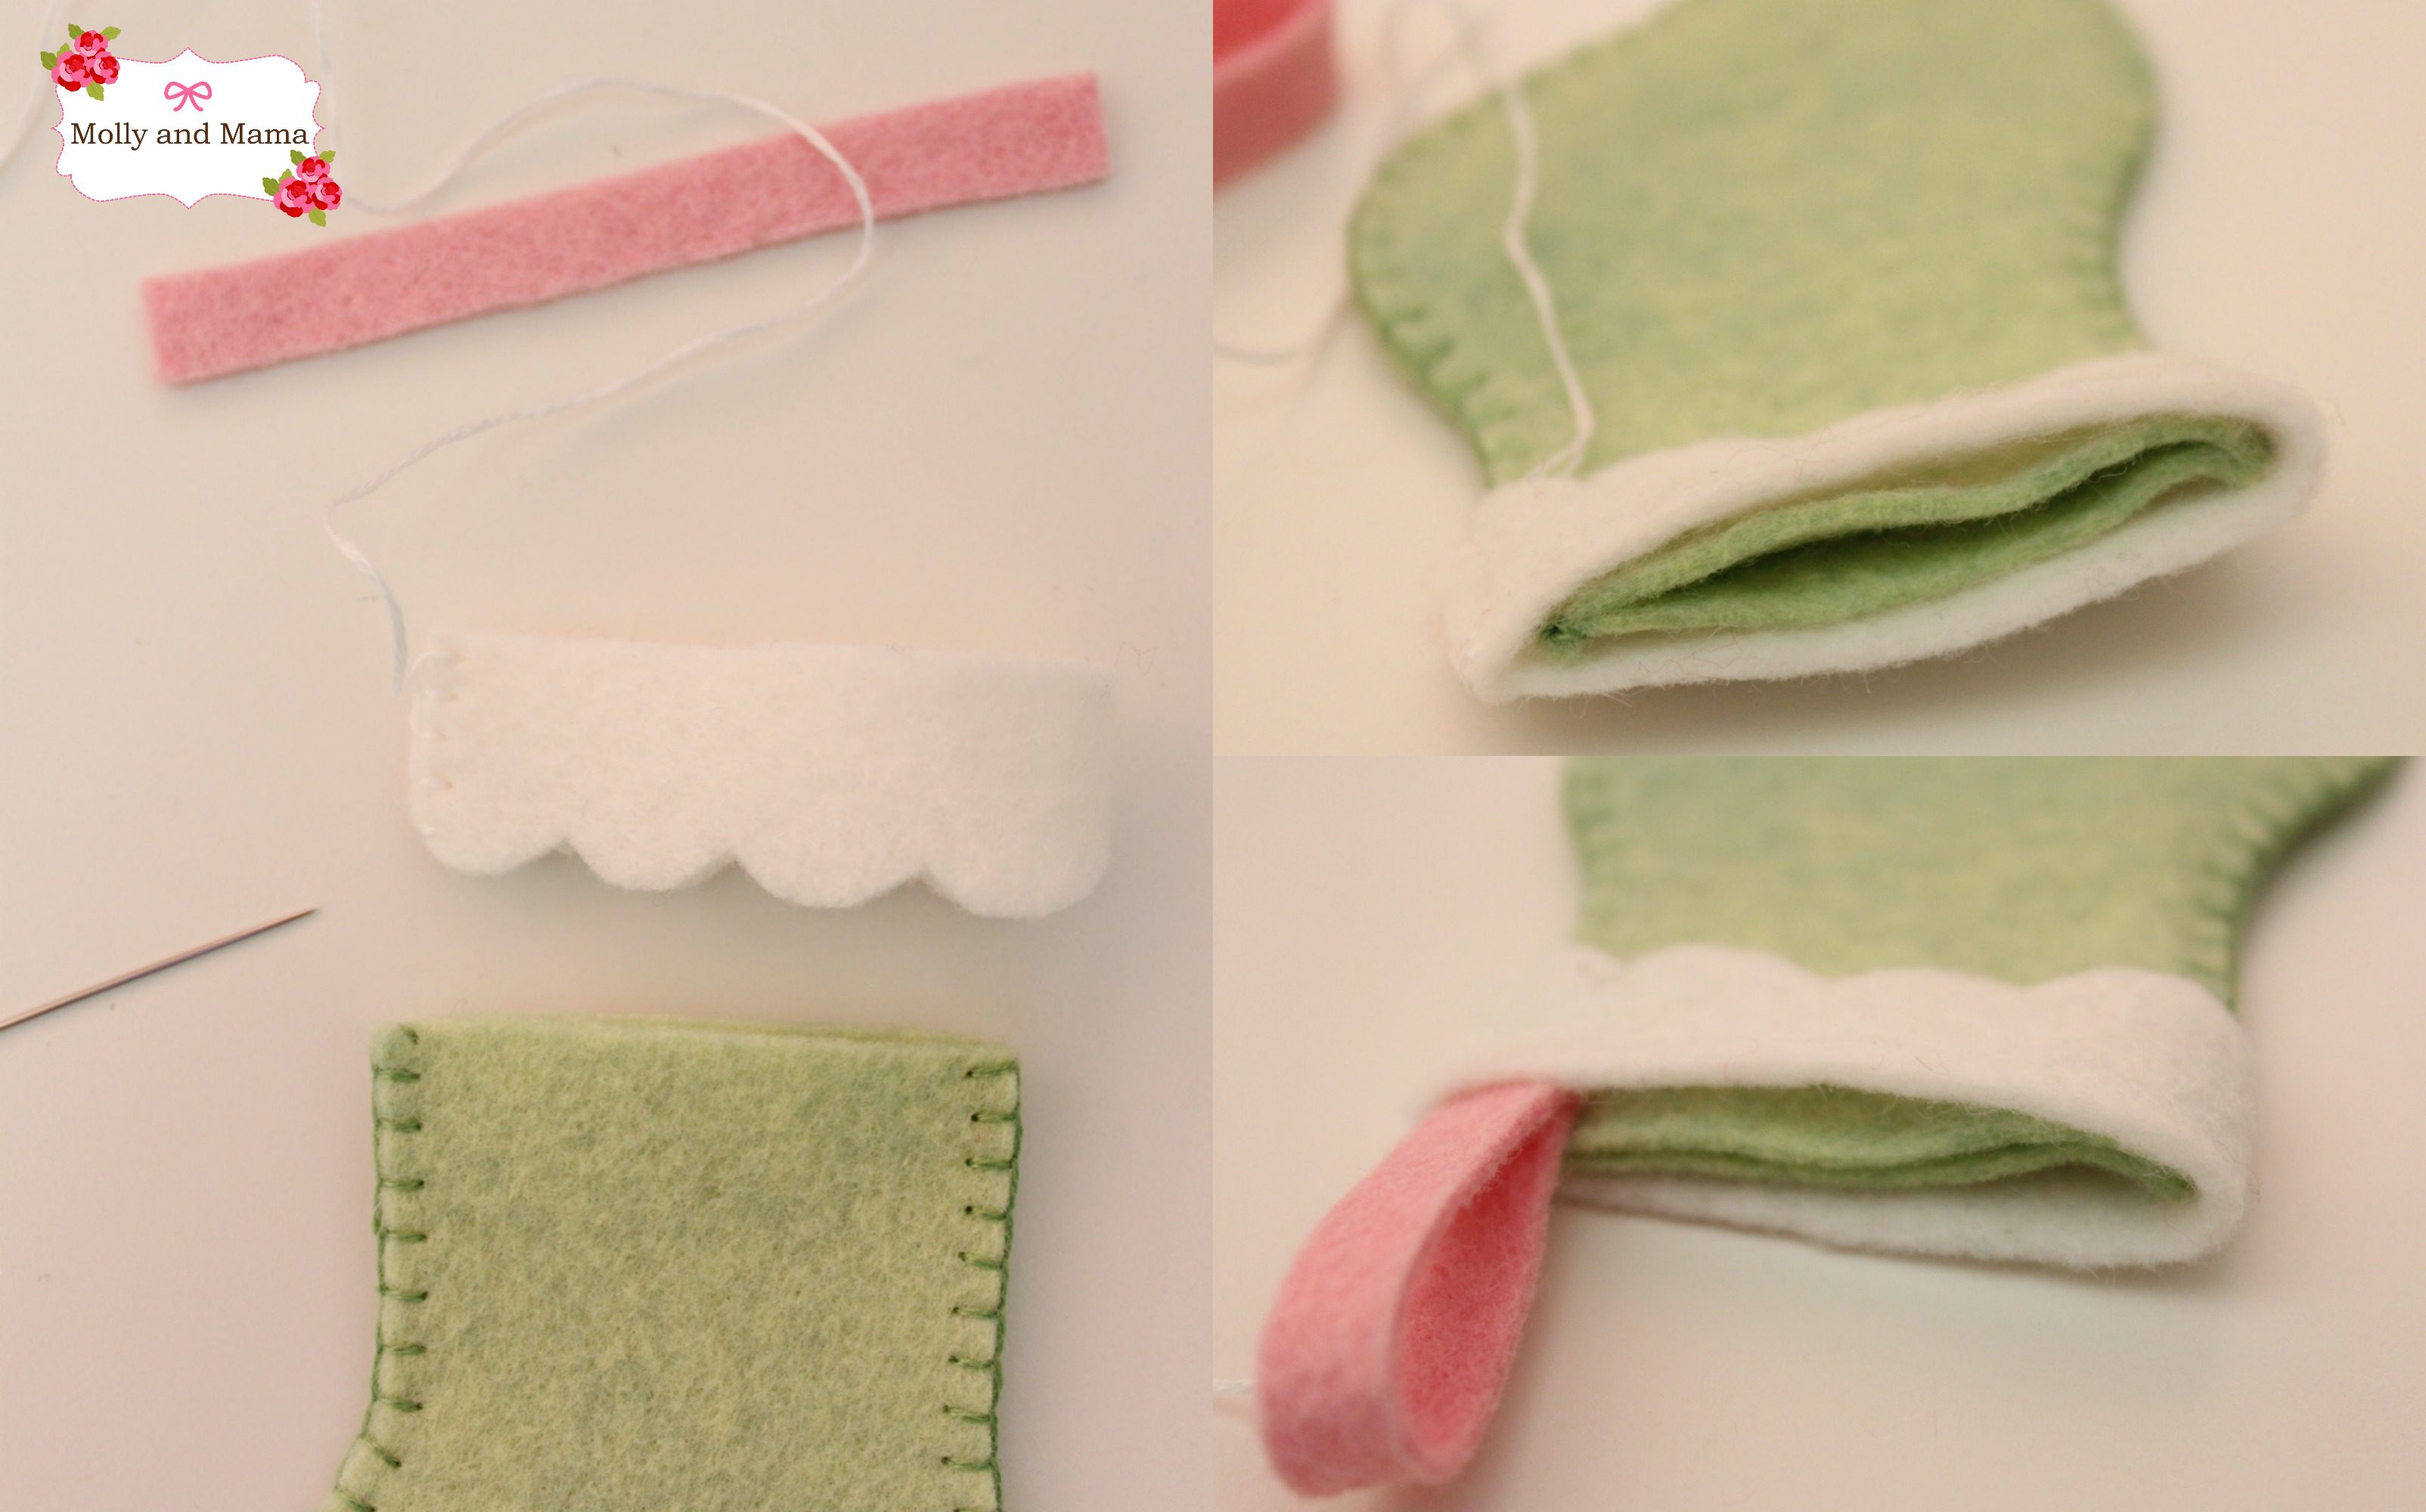
Next, fold your white stocking cuff in half and blanket stitch the side seam together, by starting at the bottom (as shown here on the left below). I used two strands of white embroidery floss to match the white cuff. Don’t trim your thread when you get to the top. You can use this thread to continue blanket stitching the cuff to the stocking top. Slip the cuff over the top of the stocking. Fold the pink hanger loop in half and tuck it between the stocking and cuff at the back of the stocking (as shown on the right below).
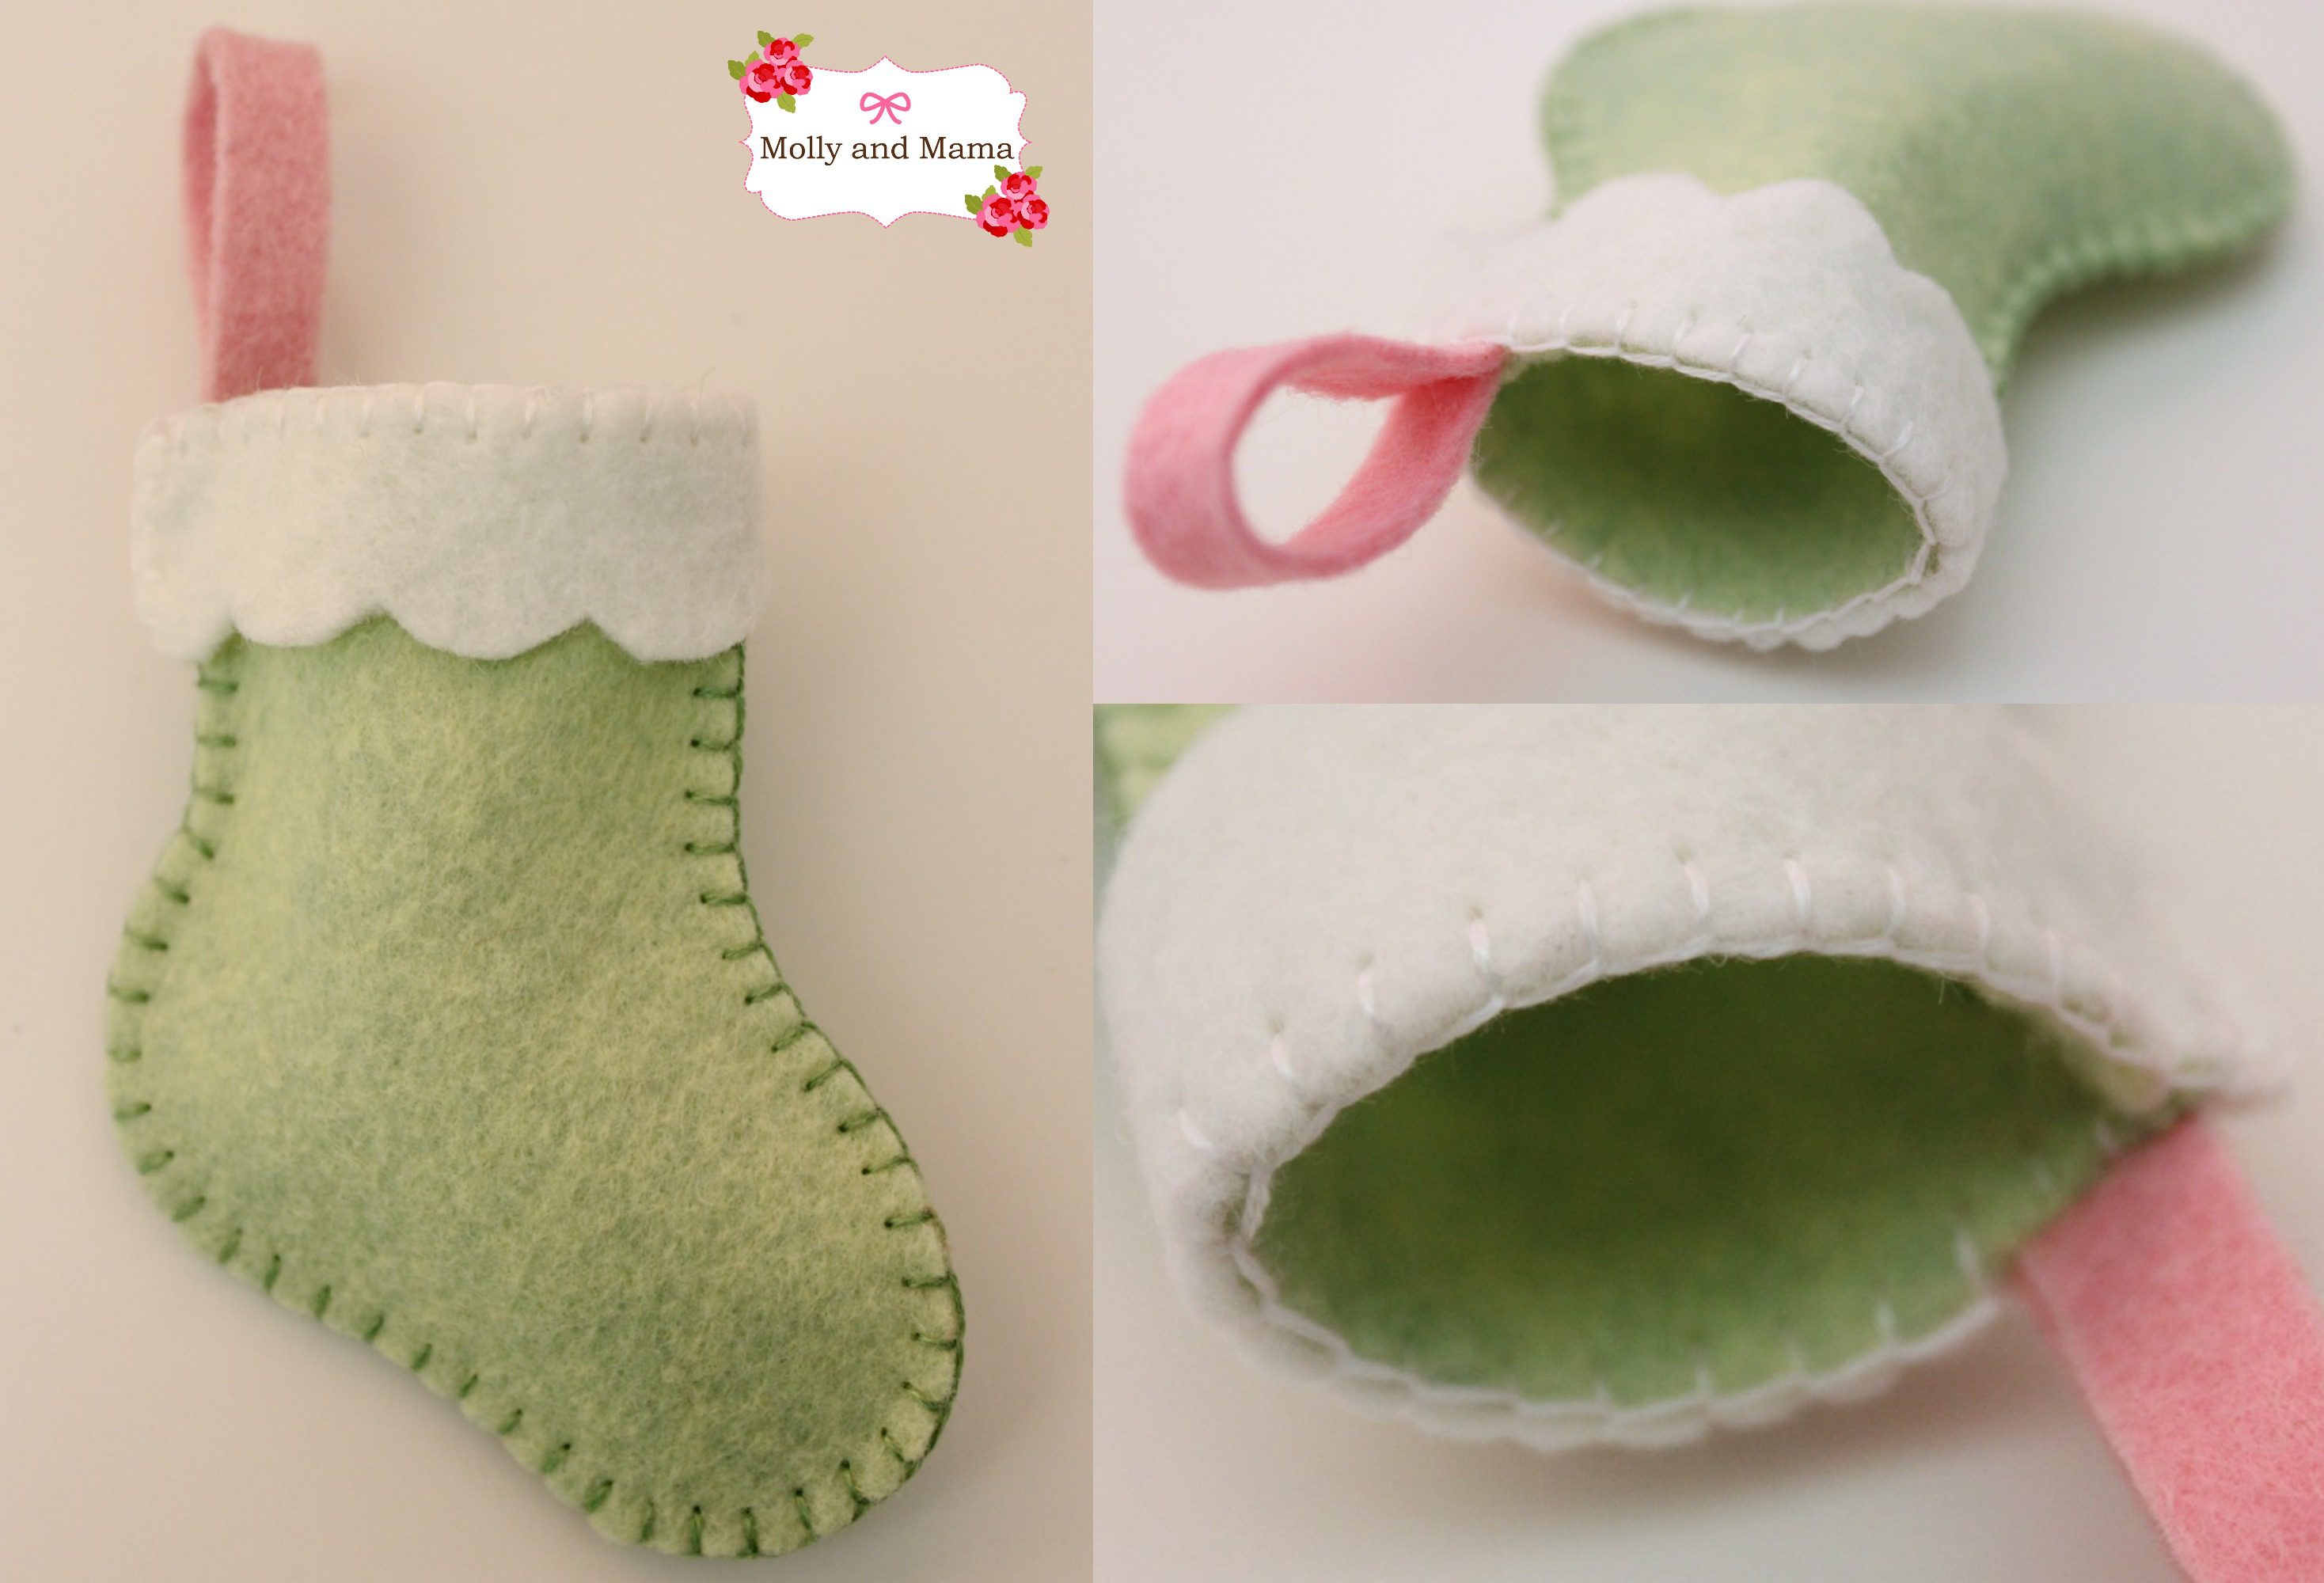
Using the remaining white floss, blanket stitch the cuff to the stocking top, being careful to stitch in the pink hanger loop as you go. When you’re done, it will look something like this;
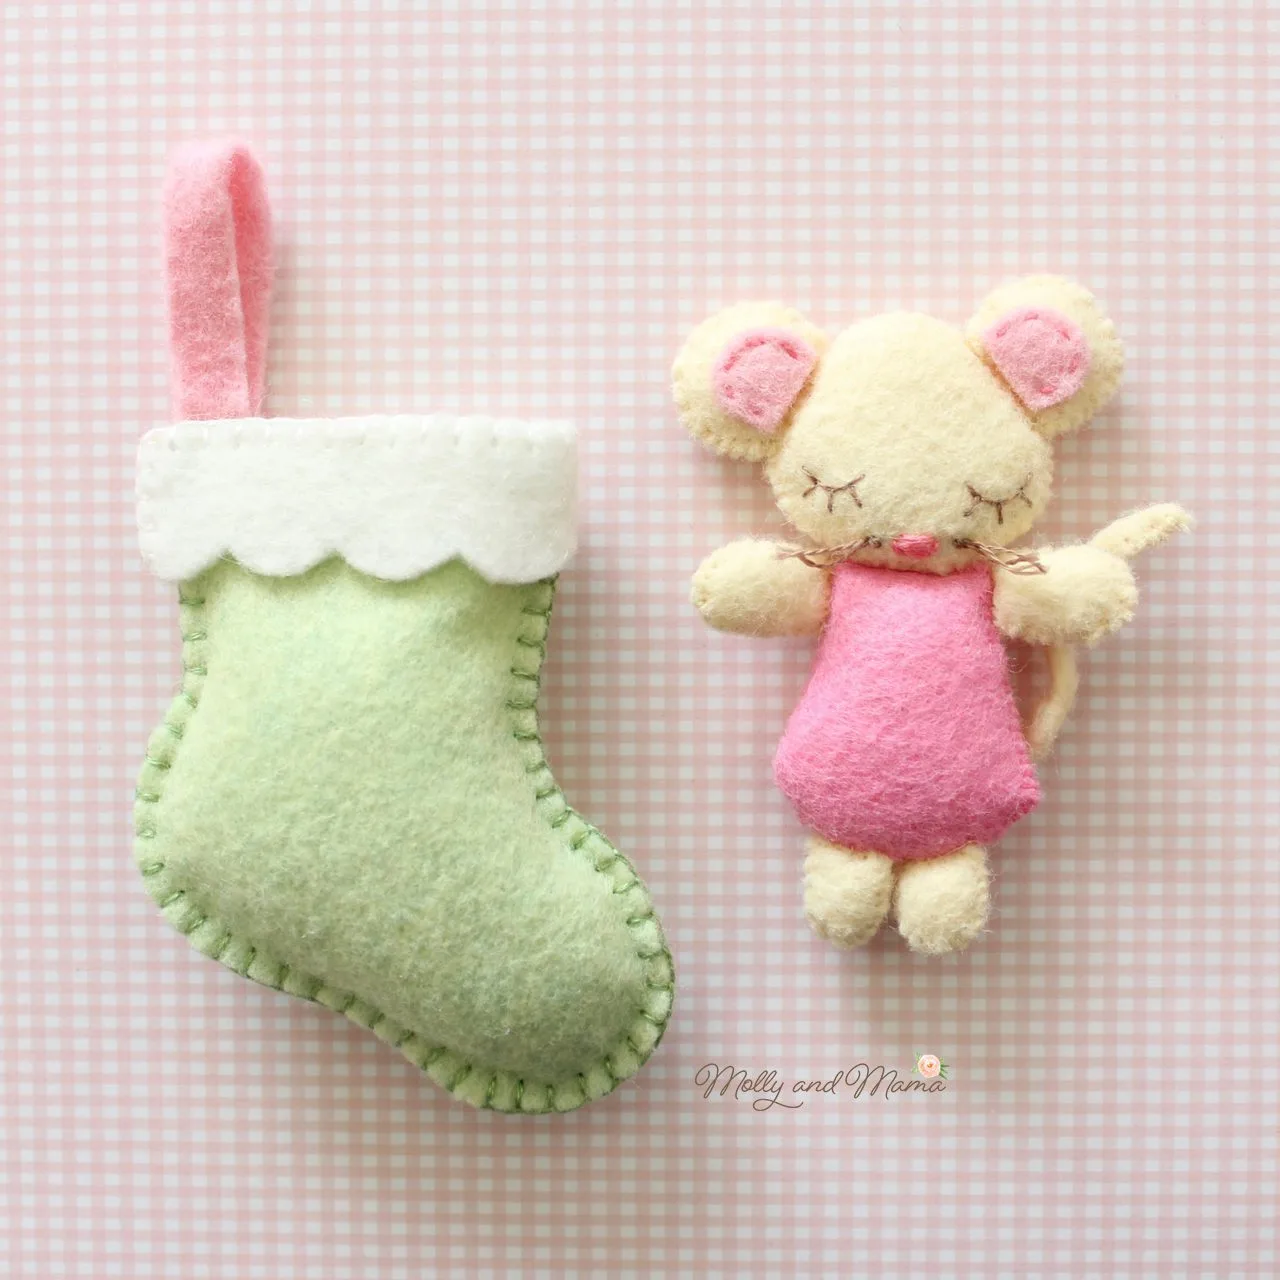
Pop your little mouse inside the stocking! You’re all done.
TIPS
- Be sure to secure your stitches well. You don’t want your little mouse unravelling!
- Use small tight whip stitches, so that the mouse is the feature, and not your stitching!
- Being a small project, with small parts, this mouse is only suitable for decoration and is not a toy.
Now that I’ve completed this cute project, I’m imagining all sorts of adorable additions to the mouse’s wardrobe and decor. I’d love to see what you come up with too.
What will you be sewing for Christmas this year? If you happen to stitch up one of these little treasures, be sure and share photos over on the Molly and Mama Facebook Page or on Instagram. Follow along to stay up to date with everything Molly and Mama. Pop over to Pinterest too, if that’s your thing. Or follow me here by signing up via email in the right hand side bar.
If you get a chance, you might like to pop over to my ETSY store too. There are some adorable felt patterns available as well as a number of quilty projects.

I’ve got some more free tutorials you might like to try too! Just head over HERE.
Thanks for being here. I hope you enjoyed this little project as much as I did. If you don’t sew it now, make sure you PIN IT for later!
Happy stitching, Lauren x
This post was written by Lauren Wright and appeared first on Molly and Mama http://www.MollyandMama.com.au